Mbed OS 5的自定义开发板移植 - NRF51
前言
最开始看到Mbed OS5的时候没太在意,然而最近Nucleo买多了就变成了……
真香!
步骤
正好手头的BLE开发板就又开始痒痒,那就上咯
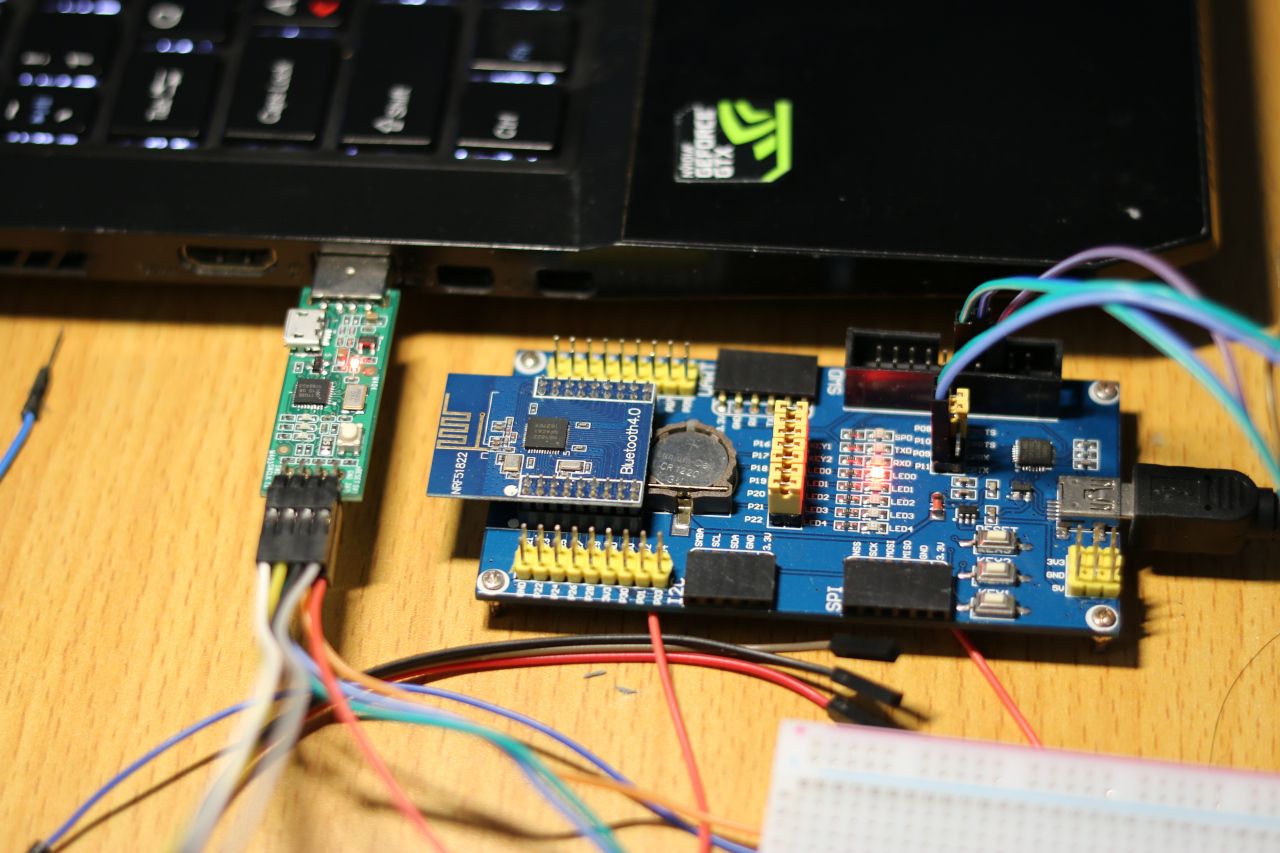
手头的NRF51开发板是微雪的NRF51822开发板,芯片型号为_AC,意即32KB SRAM+256KB Flash的型号。我们首先用Mbed CLI新建一个项目,起名叫nrf51_hello就好了。
mbed new nrf51_hello
会在当前目录创建工程目录,随便写一个main.cpp,包含main函数用来对付链接问题((
#include <mbed.h>

DigitalOut led(LED1);

int main() {
        while(true) {
                led = !led;
                wait(0.5);
        }
}
嗯,点灯工程师。
于是我们来处理板子的问题。Mbed OS 5的大致结构如下
.
├── [3.5K]  CONTRIBUTING.md
├── [ 254]  DOXYGEN_FRONTPAGE.md
├── [  73]  Jenkinsfile
├── [8.9K]  LICENSE
├── [2.5K]  README.md
├── [4.0K]  TESTS
├── [4.0K]  TEST_APPS
├── [4.0K]  UNITTESTS
├── [   0]  astyle-branch.out
├── [4.0K]  cmsis
├── [4.0K]  components
├── [4.0K]  docs
├── [107K]  doxyfile_options
├── [2.3K]  doxygen_options.json
├── [4.0K]  drivers
├── [4.0K]  events
├── [4.0K]  features
├── [4.0K]  hal
├── [ 36K]  logo.png
├── [2.9K]  mbed.h
├── [4.0K]  platform
├── [ 381]  requirements.txt
├── [4.0K]  rtos
├── [4.0K]  targets
└── [4.0K]  tools

14 directories, 11 files
添加板子定义的时候,我们需要在如下几个部分添加相应的文件
targets/targets.json
targets.json记录了所有板子的型号和特性,也是Mbed CLI寻找编译对象的入口
我们在其中添加自己的板子信息(照着SoC差不多的板子抄过来即可)
diff --git a/targets/targets.json b/targets/targets.jsonindex 3d0c2bdf5..1dc765096 100755--- a/targets/targets.json+++ b/targets/targets.json@@ -2709,6 +2709,24 @@
         "extra_labels_add": ["DELTA_DFCM_NNN50"],
         "macros_add": ["TARGET_DELTA_DFCM_NNN50"]
     },
+    "WAVESHARE_NRF51822": {+        "supported_form_factors": ["ARDUINO"],+        "inherits": ["MCU_NRF51_32K_UNIFIED"],+        "device_has": ["USTICKER", "LPTICKER", "ANALOGIN", "I2C", "I2C_ASYNCH", "INTERRUPTIN", "PORTIN", "PORTINOUT", "PORTOUT", "PWMOUT", "SERIAL", "SERIAL_ASYNCH", "SERIAL_FC", "SLEEP", "SPI", "SPI_ASYNCH", "SPISLAVE"],+        "device_name": "nRF51822_xxAC"+    },+    "WAVESHARE_NRF51822_BOOT": {+        "supported_form_factors": ["ARDUINO"],+        "inherits": ["MCU_NRF51_32K_BOOT"],+        "extra_labels_add": ["WAVESHARE_NRF51822"],+        "macros_add": ["TARGET_WAVESHARE_NRF51822"]+    },+    "WAVESHARE_NRF51822_OTA": {+        "supported_form_factors": ["ARDUINO"],+        "inherits": ["MCU_NRF51_32K_OTA"],+        "extra_labels_add": ["WAVESHARE_NRF51822"],+        "macros_add": ["TARGET_WAVESHARE_NRF51822"]+    },
     "NRF51_DK_LEGACY": {
         "supported_form_factors": ["ARDUINO"],
         "inherits": ["MCU_NRF51_32K"],
可以看出我们的板子叫做 WAVESHARE_NRF51822 。
- Target定义文件,上述的
inherits已经给定了这个板子所属的厂商和型号,在对应目录里添加相应定义文件,包含引脚定义PinNames.h和设备定义device.h。根据板子的外设和引脚信息修改对应文件即可。我们正在添加的板子应位于
targets/TARGET_NORDIC/TARGET_NRF5x/TARGET_NRF51/TARGET_MCU_NRF51822_UNIFIED/TARGET_WAVESHARE_NRF51822 中。
*** ../TARGET_NRF51_DK/PinNames.h2018-10-27 12:42:18.034690786 +0800--- PinNames.h2018-10-27 13:43:22.036980344 +0800****************** 120,134 ****
      P0_29 = p29,
      P0_30 = p30,

!     LED1    = p21,!     LED2    = p22,!     LED3    = p23,!     LED4    = p24,!     BUTTON1 = p17,!     BUTTON2 = p18,!     BUTTON3 = p19,!     BUTTON4 = p20,

      RX_PIN_NUMBER  = p11,
      TX_PIN_NUMBER  = p9,
--- 120,132 ----
      P0_29 = p29,
      P0_30 = p30,

!     LED1    = p18,!     LED2    = p19,!     LED3    = p20,!     LED4    = p21,!     BUTTON1 = p16,!     BUTTON2 = p17,

      RX_PIN_NUMBER  = p11,
      TX_PIN_NUMBER  = p9,
本例中 device.h 无需修改。
添加完板子定义我们来简单测试一下
imi415@imi415 ..ts/Hardwares/Mbed_Projects/nrf51_hello (git)-[master] % mbed compile -m WAVESHARE_NRF51822 -t GCC_ARM -j8


...

Compile [ 99.5%]: gpio_api.c
Compile [ 99.6%]: qspi_api.c
Compile [ 99.7%]: port_api.c
Compile [ 99.9%]: rtc_api.c
Compile [100.0%]: us_ticker.c
Link: nrf51_hello
Elf2Bin: nrf51_hello
| Module             |      .text |    .data |     .bss |
|--------------------|------------|----------|----------|
| [fill]             |    171(+4) |   19(+0) |   55(+0) |
| [lib]/c.a          |  22739(+0) | 2472(+0) |   56(+0) |
| [lib]/gcc.a        |   7142(+0) |    0(+0) |    0(+0) |
| [lib]/misc         |    208(+0) |   12(+0) |   25(+0) |
| [lib]/stdc++.a     |      1(+0) |    0(+0) |    0(+0) |
| main.o             |   2229(+7) |    5(+0) |   97(+0) |
| mbed-os/components |     54(+0) |    0(+0) |    0(+0) |
| mbed-os/drivers    |   787(+16) |    0(+0) |    0(+0) |
| mbed-os/events     |   1240(+0) |    0(+0) |    0(+0) |
| mbed-os/features   |  40015(+6) |    4(+0) | 1334(+0) |
| mbed-os/hal        |   1758(-2) |    8(+0) |  130(+0) |
| mbed-os/platform   |   3898(-4) |  260(+0) |  221(+0) |
| mbed-os/rtos       |  10287(-2) |  168(+0) | 6113(+0) |
| mbed-os/targets    |   9281(-3) |   20(+0) |  865(+0) |
| Subtotals          | 99810(+22) | 2968(+0) | 8896(+0) |
Total Static RAM memory (data + bss): 11864(+0) bytes
Total Flash memory (text + data): 102778(+22) bytes

Image: ./BUILD/WAVESHARE_NRF51822/GCC_ARM/nrf51_hello.hex
mbed compile -m WAVESHARE_NRF51822 -t GCC_ARM -j8  146.18s user 37.11s system 536% cpu 34.191 total
imi415@imi415 ..ts/Hardwares/Mbed_Projects/nrf51_hello (git)-[master] %
我们就可以在生成目录 BUILD/ 下找到ELF和IHEX文件了。
NRF51需要一个闭源静态库用来实现驱动和蓝牙,Nordic管他叫SoftDevice。我们首先需要下载SoftDevice到设备。
本例中依然使用OpenOCD,调试器使用LPC11U35开发板运行DAPLink(CMSIS-DAP)固件,制作方法后述。
运行
openocd -f /usr/share/openocd/scripts/interface/cmsis-dap.cfg -f /usr/share/openocd/scripts/target/nrf51.cfg
Open On-Chip Debugger 0.10.0+dev-00523-g2a3b709aa (2018-08-30-22:25)
Licensed under GNU GPL v2
For bug reports, read
http://openocd.org/doc/doxygen/bugs.html
Info : auto-selecting first available session transport "swd". To override use 'transport select <transport>'.
cortex_m reset_config sysresetreq
adapter speed: 1000 kHz
Info : Listening on port 6666 for tcl connections
Info : Listening on port 4444 for telnet connections
Info : CMSIS-DAP: SWD Supported
Info : CMSIS-DAP: FW Version = 1.10
Info : CMSIS-DAP: Interface Initialised (SWD)
Info : SWCLK/TCK = 1 SWDIO/TMS = 1 TDI = 0 TDO = 0 nTRST = 0 nRESET = 1
Info : CMSIS-DAP: Interface ready
Info : clock speed 1000 kHz
Info : SWD DPIDR 0x0bb11477
Info : nrf51.cpu: hardware has 4 breakpoints, 2 watchpoints
Info : Listening on port 3333 for gdb connections
一如既往,显示连接成功。
运行 telnet localhost 4444 连接到OpenOCD的CLI界面,运行
reset init halt CPU,接着运行
flash write_image erase /path/to/softdevice/s130.hex 下载SoftDevice到设备。
最后运行
flash write_image erase /path/to/nrf51_hello.elf 下载应用程序到设备,执行 reset 即可点灯成功(

おまけ
P.S. NRF51822 的串口默认流控,请确认CTS/RTS pin连接正常,否则串口会卡死目标板。
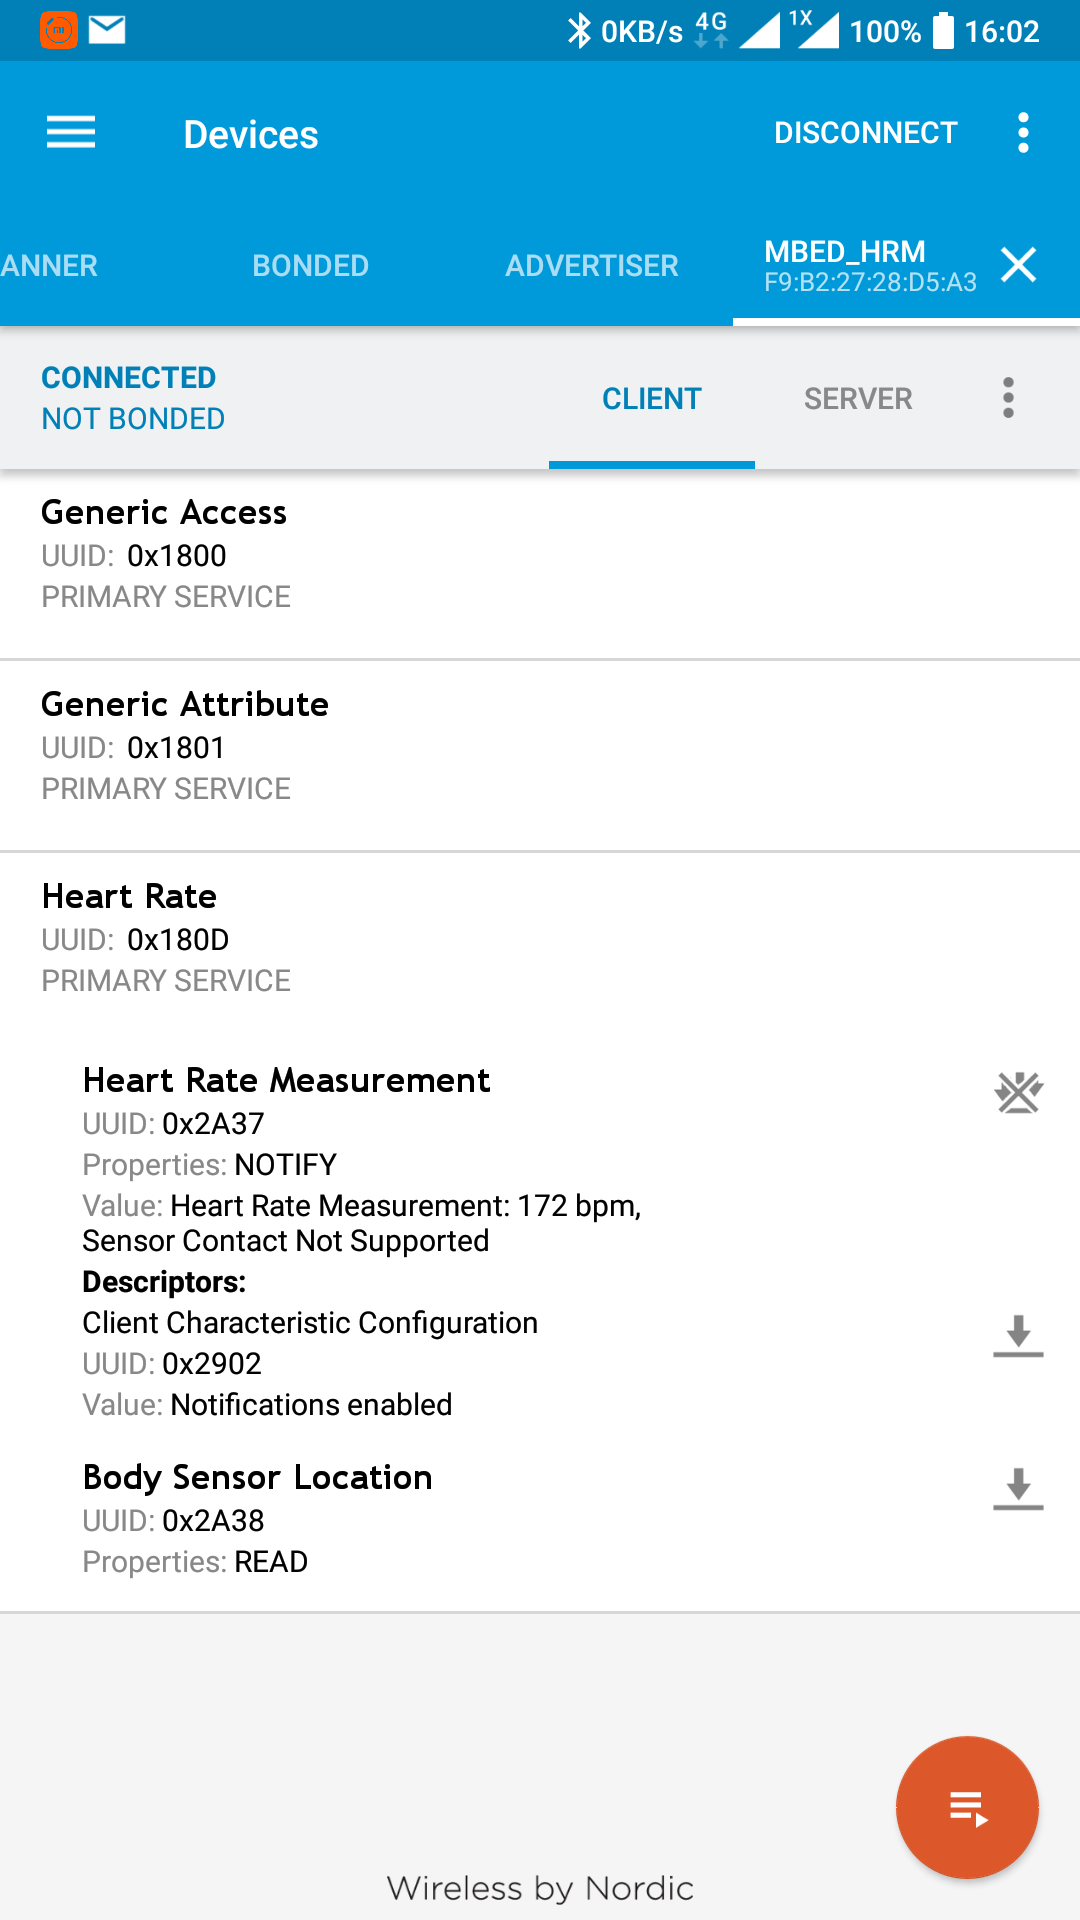
我们来运行一下Mbed OS的心率传感器示例
由于之前已经下载过SoftDevice,本次无需重新下载。直接下载应用程序到设备即可。
 Nordic NRF Connect 应用程序
通过Nordic的BLE App,就可以看到心率了…… 170了,我要挂了.jpg